Lokal Repository Ubuntu 10.10 Maverick Meerkat on Indonesai


Ubuntu Maverick MEERKAT (10.10)
 Lokal Repository Ubuntu 10.10 Maverick Meerkat on Indonesai


Lokal Repository Ubuntu 10.10 Maverick Meerkat on Indonesai-
I was up grading my Ubuntu 9.10 Karmic Koala became Ubuntu 10.10 Maverick. I ve no idea to create Repo Local from my PC any more so then i was looking for  Repo server from internet that placed on Indonesia. if U have some Ubuntu version with me, please enjoy!! 

#Buaya
deb http://buaya.klas.or.id/ubuntu/ maverick main restricted universe multiverse
deb-src http://buaya.klas.or.id/ubuntu/ maverick main restricted universe multiverse
deb http://buaya.klas.or.id/ubuntu/ maverick-updates main restricted universe multiverse
deb-src http://buaya.klas.or.id/ubuntu/ maverick-updates main restricted universe multiverse
deb http://buaya.klas.or.id/ubuntu/ maverick-security main restricted universe multiverse
deb-src http://buaya.klas.or.id/ubuntu/ maverick-security main restricted universe multiverse
#CBN
deb http://ubuntu.cbn.net.id/Ubuntu/ maverick main restricted universe multiverse
deb-src http://ubuntu.cbn.net.id/Ubuntu/ maverick main restricted universe multiverse
deb http://ubuntu.cbn.net.id/Ubuntu/ maverick-updates main restricted universe multiverse
deb-src http://ubuntu.cbn.net.id/Ubuntu/ maverick-updates main restricted universe multiverse
deb http://ubuntu.cbn.net.id/Ubuntu/ maverick-security main restricted universe multiverse
deb-src http://ubuntu.cbn.net.id/Ubuntu/ maverick-security main restricted universe multiverse
#FOSS-ID
deb http://dl2.foss-id.web.id/ubuntu/ maverick main restricted universe multiverse
deb-src http://dl2.foss-id.web.id/ubuntu/ maverick main restricted universe multiverse
deb http://dl2.foss-id.web.id/ubuntu/ maverick-updates main restricted universe multiverse
deb-src http://dl2.foss-id.web.id/ubuntu/ maverick-updates main restricted universe multiverse
deb http://dl2.foss-id.web.id/ubuntu/ maverick-security main restricted universe multiverse
deb-src http://dl2.foss-id.web.id/ubuntu/ maverick-security main restricted universe multiverse
#IndikaNET
deb http://ubuntu.indika.net.id/ maverick main restricted universe multiverse
deb-src http://ubuntu.indika.net.id/ maverick main restricted universe multiverse
deb http://ubuntu.indika.net.id/ maverick-updates main restricted universe multiverse
deb-src http://ubuntu.indika.net.id/ maverick-updates main restricted universe multiverse
deb http://ubuntu.indika.net.id/ maverick-security main restricted universe multiverse
deb-src http://ubuntu.indika.net.id/ maverick-security main restricted universe multiverse
#ITB
deb ftp://ftp.itb.ac.id/pub/ubuntu/ maverick main restricted universe multiverse
deb-src ftp://ftp.itb.ac.id/pub/ubuntu/ maverick main restricted universe multiverse
deb ftp://ftp.itb.ac.id/pub/ubuntu/ maverick-updates main restricted universe multiverse
deb-src ftp://ftp.itb.ac.id/pub/ubuntu/ maverick-updates main restricted universe multiverse
deb ftp://ftp.itb.ac.id/pub/ubuntu/ maverick-security main restricted universe multiverse
deb-src ftp://ftp.itb.ac.id/pub/ubuntu/ maverick-security main restricted universe multiverse
#ITS
deb http://mirror.its.ac.id/pub/ubuntu/ maverick main restricted universe multiverse
deb-src http://mirror.its.ac.id/pub/ubuntu/ maverick main restricted universe multiverse
deb http://mirror.its.ac.id/pub/ubuntu/ maverick-updates main restricted universe multiverse
deb-src http://mirror.its.ac.id/pub/ubuntu/ maverick-updates main restricted universe multiverse
deb http://mirror.its.ac.id/pub/ubuntu/ maverick-security main restricted universe multiverse
deb-src http://mirror.its.ac.id/pub/ubuntu/ maverick-security main restricted universe multiverse
#Si Komo
deb http://komo.vlsm.org/ubuntu/ maverick main restricted universe multiverse
deb-src http://komo.vlsm.org/ubuntu/ maverick main restricted universe multiverse
deb http://komo.vlsm.org/ubuntu/ maverick-updates main restricted universe multiverse
deb-src http://komo.vlsm.org/ubuntu/ maverick-updates main restricted universe multiverse
deb http://komo.vlsm.org/ubuntu/ maverick-security main restricted universe multiverse
deb-src http://komo.vlsm.org/ubuntu/ maverick-security main restricted universe multiverse
#Undip
deb http://jaran.undip.ac.id/ubuntu/ maverick main restricted universe multiverse
deb-src http://jaran.undip.ac.id/ubuntu/ maverick main restricted universe multiverse
deb http://jaran.undip.ac.id/ubuntu/ maverick-updates main restricted universe multiverse
deb-src http://jaran.undip.ac.id/ubuntu/ maverick-updates main restricted universe multiverse
deb http://jaran.undip.ac.id/ubuntu/ maverick-security main restricted universe multiverse
deb-src http://jaran.undip.ac.id/ubuntu/ maverick-security main restricted universe multiverse
#UGM
eb http://repo.ugm.ac.id/ubuntu/ maverick main restricted universe multiverse
deb-src http://repo.ugm.ac.id/ubuntu/ maverick main restricted universe multiverse
deb http://repo.ugm.ac.id/ubuntu/ maverick-updates main restricted universe multiverse
deb-src http://repo.ugm.ac.id/ubuntu/ maverick-updates main restricted universe multiverse
deb http://repo.ugm.ac.id/ubuntu/ maverick-security main restricted universe multiverse
deb-src http://repo.ugm.ac.id/ubuntu/ maverick-security main restricted universe multiverse
#UI
deb http://kambing.ui.edu/ubuntu/ maverick main restricted universe multiverse
deb-src http://kambing.ui.edu/ubuntu/ maverick main restricted universe multiverse
deb http://kambing.ui.edu/ubuntu/ maverick-updates main restricted universe multiverse
deb-src http://kambing.ui.edu/ubuntu/ maverick-updates main restricted universe multiverse
deb http://kambing.ui.edu/ubuntu/ maverick-security main restricted universe multiverse
deb-src http://kambing.ui.edu/ubuntu/ maverick-security main restricted universe multiverse
#UMS
deb http://mugos.ums.ac.id/ubuntu/ maverick main restricted universe multiverse
deb-src http://mugos.ums.ac.id/ubuntu/ maverick main restricted universe multiverse
deb http://mugos.ums.ac.id/ubuntu/ maverick-updates main restricted universe multiverse
deb-src http://mugos.ums.ac.id/ubuntu/ maverick-updates main restricted universe multiverse
deb http://mugos.ums.ac.id/ubuntu/ maverick-security main restricted universe multiverse
deb-src http://mugos.ums.ac.id/ubuntu/ maverick-security main restricted universe multiverse
#UNEJ
deb http://mirror.unej.ac.id/ubuntu/ maverick main restricted universe multiverse
deb-src http://mirror.unej.ac.id/ubuntu/ maverick main restricted universe multiverse
deb http://mirror.unej.ac.id/ubuntu/ maverick-updates main restricted universe multiverse
deb-src http://mirror.unej.ac.id/ubuntu/ maverick-updates main restricted universe multiverse
deb http://mirror.unej.ac.id/ubuntu/ maverick-security main restricted universe multiverse
deb-src http://mirror.unej.ac.id/ubuntu/ maverick-security main restricted universe multiverse

Blogger Auto Read More Hack : Improved With Many Control Options

Blogger Auto Read More Hack : Improved With Many Control Options

Hi! How is it day?

Now, i wanna share something that related with my wishing to create my blog looks simple and easy to read. I wanna my blog looks Auto Read More style.
Read more style is used to cut our post on homepage, post will appear fully when we click read more link. It's cut automatically and if we insert image, it appears thumbnail.

And fortunately, i found some article that helps me to create my blog looks Auto Read More  Improved With Many Control Options.

Read More  Improved Control Options :

1. You can add default thumbnail image when your posts don't have any image.
2. You can turn off auto read more for some first posts.
3. Option to turn on/off read more for home page and labels page.
:) so, what do you say?? and this is it!!!

How To Add Auto Read More Hack To Blogger?

1.

Go to Blogger Dashboard >> Template (Download and backup your old template) >> Edit HTML>> Check Expand Widget Template checkbox

2.

Find this code :
</head>
and add the codes below just above it,

<script type="text/javascript">
var summaryConf = {
    showImage: true,
    imgFloat: 'left',
    imgWidth: 120,
    imgHeight: 90,
    defaultThumb: 'https://blogger.googleusercontent.com/img/b/R29vZ2xl/AVvXsEhvm4vE3pHPN_kXZaP5-NnLtdtXvTub51OGgfJWl3THgW3xY2rJfvxvy1dxDYV7thrfF4fvXB0alnZPnBeZjqCD1K4FGHaWTLLWsH_SrRYddCwTdo9UuBjsDY9lBiDlU64dCIYG_8SajKg/s1600/no-thumb.jpg',
    words: 65,
    wordsNoImg: 80,
    skip: 0,
    showHome: true,
    showLabel: true
};
</script>
<script type="text/javascript" src="http://code.helperblogger.com/summary.min.js"></script>

You can easily customize above highlighted values :


showImage : true, If you don't want to show image thumbnail then simply replace true with false
imgFloat : 'left', If you want to float image at the right of summary then simply
replace left with right
imgWidth : 120, This is width of image
imgHeight : 90, This is height of image
defaultThumb : 'https://blogger.googleusercontent.com/img/b/R29vZ2xl/AVvXsEhvm4vE3pHPN_kXZaP5-NnLtdtXvTub51OGgfJWl3THgW3xY2rJfvxvy1dxDYV7thrfF4fvXB0alnZPnBeZjqCD1K4FGHaWTLLWsH_SrRYddCwTdo9UuBjsDY9lBiDlU64dCIYG_8SajKg/s1600/no-thumb.jpg', If you want to set your own default thumbnail then replace above image URL with yours.
words : 65, This is number of words when there is a thumbnail
wordsNoImg : 80, This is number of words when there is no thumbnail\
skip : 0, skip some first posts, don’t apply auto readmore for them. If this option is set
to 0 so that all posts are applied auto readmore.
showHome and showLabel : allow or not auto readmore for homepage and label page. true is allowed, false is not.

3.

After adjust it, find this code :
<data:post.body/>
and replace with :
<span expr:id='data:post.id'><data:post.body/></span>
 
<b:if cond='data:blog.pageType == "index"'>
    <script type='text/javascript'>summary("<data:post.id/>")</script>
<span style='float:right;padding-top:20px;'><a expr:href='data:post.url'>Read More</a></span>
<b:else/>
    <b:if cond='data:blog.pageType == "archive"'>
        <script type='text/javascript'>summary("<data:post.id/>")</script>
    </b:if>
</b:if>
on standard template you should find 3 times "<data:post.body/>" code to the repeats , then replace all the codes till 3 times.

4.

When done, save the template.

Now you can view your blog with readmore style in every posts.
Enjoy blogging!

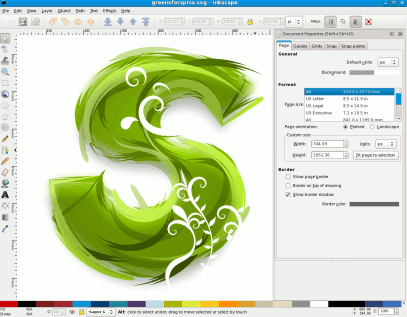
Inkscape 0.48.1 released and PPA installation instructions included

installing inkscape in ubuntu
Inkscape is an open source drawing tool that uses the World Wide Web Consortium's (W3C) scalable vector graphics format (SVG). Some supported SVG features include basic shapes, paths, text, markers, clones, alpha blending, transforms, gradients, and grouping. In addition, Inkscape supports Creative Commons' metadata, node-editing, layers, complex path operations, text-on-path, text-in-shape, and SVG XML editing. It also imports several formats like EPS, PostScript, JPEG, PNG, BMP, and TIFF and exports PNG as well as multiple vector-based formats.

I use Inkscape for my ordinary graphic soft under ubuntu OS. So that's the way i curious whit what is new on Inkscape 0.48.1

What is new 0.48.1


Regression fixes
Many small regressions in the node tool were fixed. Here are some examples:

* Shift will turn off snapping in the node tool. Bug #588628
* Duplication of nodes in the node tool using Shift+D works again. Bug #555449
* Changing all selected segments into straight lines in the node tool using Shift+L works again. Bug #532905
* Changing the type of nodes to cusp will retract their handles only if all selected nodes are already cusp. This improves usability when working with selections that contain both cusp and smooth nodes.

Important bugfixes

* Exporting of masks has been substantially improved in all Cairo-based output formats.
* Several crash bugs in the node tool have been fixed. Bug #544599, Bug #591986, Bug #605575
* Rulers are redrawn properly with recent versions of GTK. Bug #627134
* Unlinking an orphaned clone no longer causes a crash. Bug #675309
* Problems with extensions sometimes not working at all on Mac OS X have been fixed. Bug #482993
* Inkscape should no longer crash due to missing icons at startup or when opening the document properties dialog. Bug #658055, Bug #651678
* Shift-clicking on the top rounding handle of a rectangle will no longer cause a crash. Bug #680520
* Inkscape builds correctly with recent versions of Poppler. Bug #676271

Known issues

* Stamping in the node tool does not work.
* Closing an unchanged document that contains connectors might ask to save, as if the document was modified. Pressing Ctrl+Z before closing will avoid bringing up the dialog.

Install Inkscape 0.48.1 in Ubuntu using PPA


1.

Open the terminal and run the following commands :

    sudo add-apt-repository ppa:ricotz/ppa
    sudo apt-get update
    sudo apt-get install inkscape

Ubuntu Mascots In Pictures

Ubuntu Mascots In Pictures- as we know, Ubuntu version has a code name in the form of "Adjective Animal" and initially, and know let's take a look at all Ubuntu Mascots from the warthog to  the quetzal :

Ubuntu Warty WARTHOG (4.10):

Ubuntu Warty WARTHOG (4.10)


Ubuntu Hoary HEDGEHOG (5.04):

Ubuntu Hoary HEDGEHOG (5.04)


Ubuntu Breezy BADGER (5.10):

Ubuntu Breezy BADGER (5.10)


Ubuntu Dapper DRAKE (6.06):

Ubuntu Dapper DRAKE (6.06)


Ubuntu Edgy EFT (6.10):

Ubuntu Edgy EFT (6.10)


Ubuntu Feisty FAWN (7.04):

Ubuntu Feisty FAWN (7.04)


Ubuntu Gutsy GIBBON (7.10):

Ubuntu Gutsy GIBBON (7.10)


Ubuntu Hardy HERON (8.04):

Ubuntu Hardy HERON (8.04)


Ubuntu Intrepid IBEX (8.10):

Ubuntu Intrepid IBEX (8.10)


Ubuntu Jaunty JACKALOPE (9.04):

Ubuntu Jaunty JACKALOPE (9.04)


Ubuntu Karmic KOALA (9.10):

Ubuntu Karmic KOALA (9.10)


Ubuntu Lucid LYNX (10.04):

Ubuntu Lucid LYNX (10.04)


Ubuntu Maverick MEERKAT (10.10):

Ubuntu Maverick MEERKAT (10.10)


Ubuntu Natty NARWHAL (11.04):

Ubuntu Natty NARWHAL (11.04)


Ubuntu Oneiric OCELOT (11.10):

Ubuntu Oneiric OCELOT (11.10)


Ubuntu Precise PANGOLIN (12.04):

Ubuntu Precise PANGOLIN (12.04)


Ubuntu Quantal QUETZAL (12.10):

Ubuntu Quantal QUETZAL (12.10)


Up next: Ubuntu 13.04 RR. Will it be called Rampant RABBIT? Or maybe Rowdy RHINO? We'll see. :P

Download GIMP 2.8 Script-FUs Pack (More Than 100 Effects And Filters)

gimp 2.8 script fu

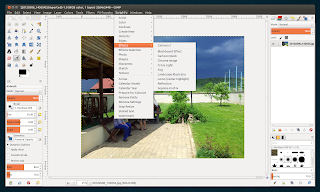
GIMP 2.8 Script-FUs is a collection of more than 100 scripts, initially created for GIMP 2.4, that have been fixed/updated recently to work with the latest GIMP 2.8. Besides filters and effects, there are also some scripts that allow you to easily create a calendar, create a CD label, add watermark and more.

Scripts included in the latest GIMP 2.8 Script-FU pack:
  • Artist: Angled strokes, Color Pencil, Conte-charcoal crayon, Crosshatched, Cutout, Inkpen, Note Paper, Paletter Knife, Pastel, WaterColor
  • Color: Invert, Saturation, BW from Graphic, Color Temp, Funky Color, Grey Point, Split Tone With ED, Tone Mapping
  • Contrast: Shadow Recovery, Auto Contrast, Change Contrast, High Pass, ISO Noise Reduction
  • Create new: CD label, GlassEffect Text, Glossy Orb, Letter Drop Animation, Scribbled Text, Text Balloon, Text Circle
  • Disorts: Circle Maker, Photocopy, Wrap Effect
  • Edges: Fade Outline, Fuzzy Border, Jagged Border, Translucent Border, Add Matte, Art Border, Frame like poster with strait corners, Frame like slide with round corners, Frame with Bevel, Frame with hover effect and round corners, Photo Border Fancy, Photo Frame, Tasty Frame
  • Effects: Cartoon 2, Blackboard Effect, Cartoon Quick, Chrome Image, Cross Light, Fog, Landscape Illustrator, Lomo, Reflection, Sepoina Graf-ix
  • Effects Selection: Bevel Selection, Chisel Or Carve, Glass Selection, Glow Selection
  • Photo: Picture to graphic, Copyright text, EZ Red Skin Fix, Film Grain, Fix Overblown, Halftone, Highlight to Sky and Clouds, Infrared Simulation, Red Eye by Selected Area, Red Eye Desaturate, Vintage Photo, Web Photo Editor
  • Shapes: CD Mask, Circle Draw, Old Paper, Stampify
  • Sharpness: High-Passs Sharpen, BSSS-Sharpen, Midtone-Sharp, Smart Sharpening, Wisest Sharpen, Blur Non-Edges, Make wonderful, Orton effect, Pixel Gradient, Sharp Blur, Soft Focus, Soft Focus Simple, Wrap Sharp
  • Sketch: quick sketch, Drawing, Line Sketch, Pastel Sketch, Pencil Sketch, Pen Drawn, Roy Lichtenstein, Synthetic Edges, Toned Line Art
  • Texture: Patchwork, Stained Glass, Texturizer
  • Misc: Arrow, Calendar Month, Calendar year, Prepare for Colorize, Remove Paths, Remove Settings, Step Resize, Stoked text, Watermark
According to the release announcement, the scripts included in this pack do not work with GIMP 2.6, so only use them with GIMP 2.8 (or 2.7, the GIMP 2.8 development branch).

To install the scripts, download the archive, extract it and copy the extracted  scripts (.scm) to the following location:
  • Linux: for your user: ~/.gimp-2.8/scripts or system-wide: /usr/share/gimp/2.0/scripts
  • Windows Vista/7: C:\Program Files\GIMP 2\share\gimp\2.0\scripts or C:\Users\YOUR-NAME\.gimp-2.8\scripts
  • Windows XP: C:\Program Files\GIMP 2\share\gimp\2.0\scripts or C:\Documents and Settings\yourname\.gimp-2.8\scripts

Download  GIMP 2.8 Script FUs

Install GIMP 2.8.2 In Ubuntu 12.04 Precise Pangolin

gimp 2.8.2

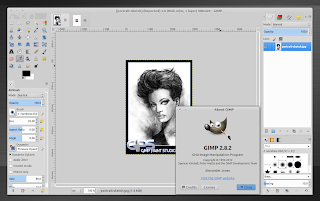
GIMP 2.8.2 has been released a few days ago with lots of bug fixes, but without any new features.

Among the changes included in the latest GIMP 2.8.2 are:
  • Mention that the image was exported in the close warning dialog
  • Fix the visibility logic of the export/overwrite menu items
  • Remove all "Use GEGL" menu items, they only add bugs and zero function
  • Improve performance of display filters, especially color management
  • Fix the image window title to comply with the save/export spec and use the same image name everywhere, not only in the title
  • Fix positioning of pasted/dropped stuff to be more reasonable
  • Fix remembering of JPEG load/save defaults
  • Mac OSX / Windows fixes

The 2.8.x series won't include any new features, just bug fixes. The plan is to add full GEGL support, high bit depths, an unified transform tool and other new features with GIMP 2.10 and finally port GIMP to GTK3 with version 3.0.


Install GIMP 2.8.2 in Ubuntu 12.04 Precise Pangolin


The PPA that provides GIMP 2.8.x for Ubuntu 12.04 users has been updated today with the latest GIMP 2.8.2.

To add the PPA and install GIMP 2.8.2 in Ubuntu 12.04 Precise Pangolin, use the following commands:
sudo add-apt-repository ppa:otto-kesselgulasch/gimp
sudo apt-get update
sudo apt-get install gimp

For source files, Windows and Mac OSX installers, see the GIMP download page.

Gparted in ubuntu

Gparted is a free disk utlity management package for Linux that allows you to partition, resize and format your hard drives.

Gparted can format drives drives to the following file systems:

btrfs
ext2
ext3
ext4
hfs
hfs+
linux-swap
nilfs2
ntfs
resiserfs
reiser4
ufs
xfs

How to install gparted in ubuntu?

You can use Synaptic  Manager to install gparted in ubuntu by searching on and install, or use default repository by the following command :

sudo apt-get install gparted
run gparted via terminal :
sudo gparted
Screenshot of Gparted


Ubuntu:: Turn off(Shutdown),Restart,etc your Ubuntu with timer?

Idsasdf

Ubuntu :: Turn off(Shutdown),Restart,etc your Ubuntu with timer?
Sometime we wanna shutdown or restart our PC in particular time, and we can set the timer to shutdown our PC. Is it able on our Ubuntu OS??

Absolutely "Yes!" we can do that, we can shutdown ,Restart,etc on our Ubuntu with set the timer.
Now Check this out!

How to turn off Ubuntu OS with timer ?

1.

 Open the terminal .

2.

and type the following command :
shutdown  +adjust_the_timer -h
example :
 shutdown  +30 -h
explanation :

The timer set +1 as a minute or 60 sec.
if i'm setting +30 it means, i want to shutdown my Ubuntu  OS after 30 minutes.
Why shutdown?
because i use shutdown property "-h".

If you want to make other shutdown properties, you can check out with type on "terminal" :
shutdown --help


 and it should appear like :

Usage: shutdown [OPTION]... TIME [MESSAGE]
Bring the system down.

Options:
  -r                          reboot after shutdown
  -h                          halt or power off after shutdown
  -H                          halt after shutdown (implies -h)
  -P                          power off after shutdown (implies -h)
  -c                          cancel a running shutdown
  -k                          only send warnings, don't shutdown
  -q, --quiet                 reduce output to errors only
  -v, --verbose               increase output to include informational messages
      --help                  display this help and exit
      --version               output version information and exit

TIME may have different formats, the most common is simply the word 'now' which
will bring the system down immediately.  Other valid formats are +m, where m is
the number of minutes to wait until shutting down and hh:mm which specifies the
time on the 24hr clock.

Logged in users are warned by a message sent to their terminal, you may include
an optional MESSAGE included with this.  Messages can be sent without actually
bringing the system down by using the -k option.

If TIME is given, the command will remain in the foreground until the shutdown
occurs.  It can be cancelled by Control-C, or by another user using the -c
option.

The system is brought down into maintenance (single-user) mode by default, you
can change this with either the -r or -h option which specify a reboot or
system halt respectively.  The -h option can be further modified with -H or -P
to specify whether to halt the system, or to power it off afterwards.  The
default is left up to the shutdown scripts.

How To Add or Change Favicon on Blogger Blogspot

Favicon (Favorites Icon) is the small picture (usually 16px x 16px in size) you see beside some some site's name in your browser's address bar.


change blogger favicon

Having your own favicon with a nice graphical reminder of your site beside is a good way to get visitors attention again. Now Blogger users can add a custom favicon for their blogs from the Design > Page Elements tab, by clicking on the Edit link on the "Favicon" element above the navbar element.

"For many bloggers, having a custom favicon (the tiny image displayed in your browser’s window or tab) is the finishing touch that ties together the design and identity of a great looking blog. Today, we're pleased to announce that Blogger in Draft users can now add a customized favicon to their blog. ~Blogger in Draft"

Steps adding your own favicon

1. Log in to your Blogger's Dashboard, go to the Design -> Page Elements.

2. Click on the "Edit" link on the "Favicon" setting above the navbar element.

3. A popup window will open where you can search for an image in your hard drive to replace the default favicon image. Click on "choose file" button and search for your favicon (it should have the .ico extension) - then click on "Save".

4. Now you should see your own favicon instead of blogger's default favicon.


Don't worry if it won't appear immediately. It may take some time until your new favicon will show in your Browser's tab or window.

If you want to add animated favicons to your Blogger blogs, then you should follow another method.

How to add an animated favicon in Blogger

1. Log in to your Blogger account > Design > Edit HTML > check the "Expand widget templates" box

2. Search (CTRL + F) for:

 <b:skin> 

3. And just above it, paste this code:

<link href="your-favicon-links-goes-here" rel="icon" type="image/gif"/>

See the screenshot for more details
animated favicon blogger, how to


Note: replace your-favicon-links-goes-here with your favicon's link location
You can choose from here some cool favicons for your site/blog: http://www.favicon.cc/ (just download the favicon you like - upload it on tinypic or on a blogger's post, then copy the link address/direct link)

4. Save the Template.

Now your favicon should be alive. Just view your blog to see it in action (:

source : http://helplogger.blogspot.com/2012/04/how-to-add-or-change-favicon-on-blogger.html

5 Nice GNOME 3.4 Themes [Ubuntu PPA Available]

Nice GNOME 3.4 Themes [Ubuntu PPA Available] Collections

To install the GTK3.4 themes below in Ubuntu 12.04 (besides the last one), firstly add the WebUpd8 Themes PPA:
sudo add-apt-repository ppa:webupd8team/themes
sudo apt-get update
Then use the command below each theme to install it.


Adwaita-X dark/light is a theme pack based on Adwaita, that includes GTK2, GTK3, Mutter/Metacity and Xfwm4 themes, in 2 variants: with dark and light window theme:

Adwaita X dark

Adwaita X light


To install Adwaita-X dark in Ubuntu, use the command below:
sudo apt-get install adwaita-x-dark-theme

For Adwaita-X light, use:
sudo apt-get install adwaita-x-light-theme

For other Linux distributions, download Adwaita X from Gnome-Look.


Gnomish Beige is a beautiful, beige theme based on Adwaita. The pack comes with GTK2/3 (GTK 3.4 compatible) themes as well as a GNOME Shell theme:


To install it in Ubuntu, use the following command:
sudo apt-get install gnomishbeige-theme

For other Linux distributions, download Gnomish Beige from Gnome-Look.


Gnomish Gray is a silver gray GTK3 theme which except for the main colour, looks the same as Gnomish Beige. The pack comes with GTK2 and GNOME Shell themes too:


To install it in Ubuntu, use the command below:
sudo apt-get install gnomishgray-theme

For other Linux distributions, download Gnomish Gray from Gnome-Look.


Ambiance-Precise is Ubuntu's Ambiance theme with some tweaks such as dark Nautilus sidebar, dark context menus, and fixed GNOME 3 classic session panel:


To install Ambiance Precise in Ubuntu, use the command below:
sudo apt-get install ambiance-precise-theme

For other Linux distributions, you can download Ambiance-Precise from GitHub.


Evolve, a cool, simplistic GNOME 3 theme, has been updated to work with GNOME 3.4 today:


To install it in Ubuntu, use the following commands:
sudo add-apt-repository ppa:satyajit-happy/themes
sudo apt-get update
sudo apt-get install evolve-gtk-theme

For other Linux distributions, download Evolve via DeviantArt.


To apply any GNOME theme, use GNOME Tweak Tool, Ubuntu Tweak, MyUnity, Unsettings or other such tools.

Note: The GTK themes above work under both GNOME Shell and Unity.

Add Facebook Like/Fan Box to Blogger

Add Facebook Like/Fan Box to Blogger


Facebook Like/Fan Box is a great widget that allows the readers to subscribe your blog trough their Facebook account. Readers ll also receive your most blog update on their Facebook Page. This widget ll show the faces liker on the Like Box.

First if you wanna add Facebook Like/Fan Box to Blogger you need to create fan page on your facebook account. If you haven't created yet, follow this step to How to create a facebook fan page(#Helplogger.blogspot.com).


How to add Facebook Like/Fan Box to Blogger?

1.

Find your Facebook fan page on your facebook account, it should be on the top url address when you opened  your Facebook fan page.
and this is mine "http://www.facebook.com/ilovemrobu"

2.

Go to this link :   http://developers.facebook.com/docs/reference/plugins/like-box  

3.

Set the properly :

 
If you ve done and got your desire looks of Facebook Fan Page >> Click the 
"Get code" button.

4.

You'll be given two codes, titled HTML 5, XFBML and IFRAME. You only need the "IFRAME" code.
Select it and copy the code generated for your box as it is shown in the example below:

5.

Go to Blogger Dashboard >> Design >> Page Elements >> click on the Add a Gadget link >> select HTML/JavaScript and paste the code in the HTML box.

click save and you re done!

enjoy blogging!